

DIY paper snowflakes: a cheap, easy craft
December 10, 2018
This holiday season everyone will be flocking to the craft stores to pick up a plethora of festive decorations, but for those who can’t afford to go above and beyond with decorating this year, you can still transform your own dorm, apartment or home into a winter wonderland with merely two materials: scissors and paper.
Paper snowflakes have been a treasured craft during the holidays for decades, but the art of it is still a mystery to some. The concept is simple with a little practice, and once you learn this technique you can make any size snowflake in many different designs. The snowflakes can be taped to your windows and walls or simply hung from the ceiling, and they’re sure to impress anyone who visits.
To begin, fold the top corner of the paper down to the edge on the left side, leaving about 2 ½ inches of space at the bottom, then cut off the excess 2 ½ inches with scissors.
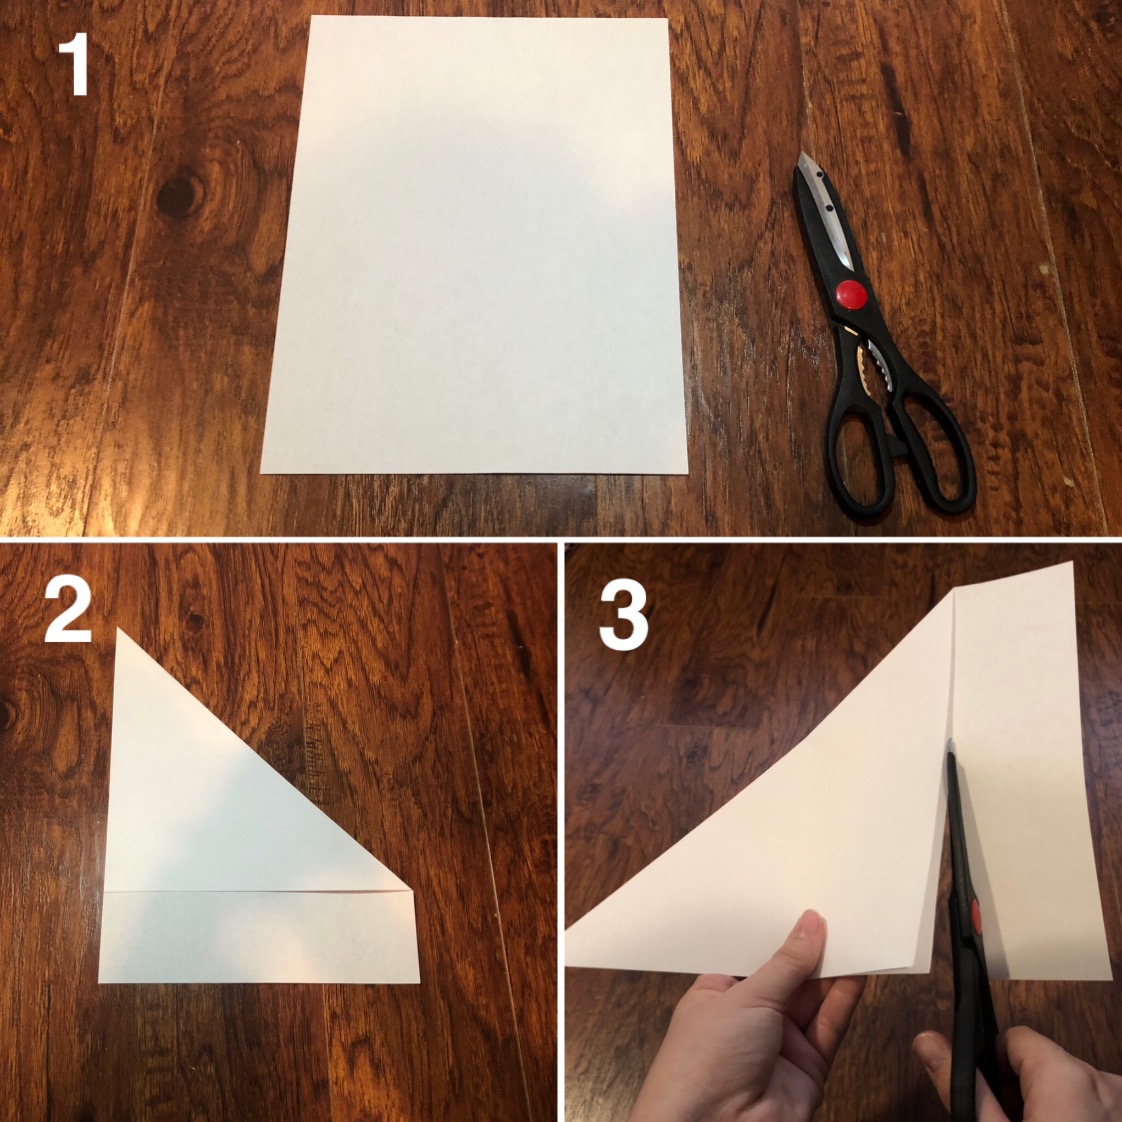
Sarah Fischer/Northern Star
This will leave a triangle shaped piece that has been folded once. Bring the right corner over to the left corner and fold. Turn the triangle so that the longest side is at the bottom. Fold the bottom right corner to about halfway across the triangle and fold it over again, creating a shape that looks like it has a pair of pointed legs.
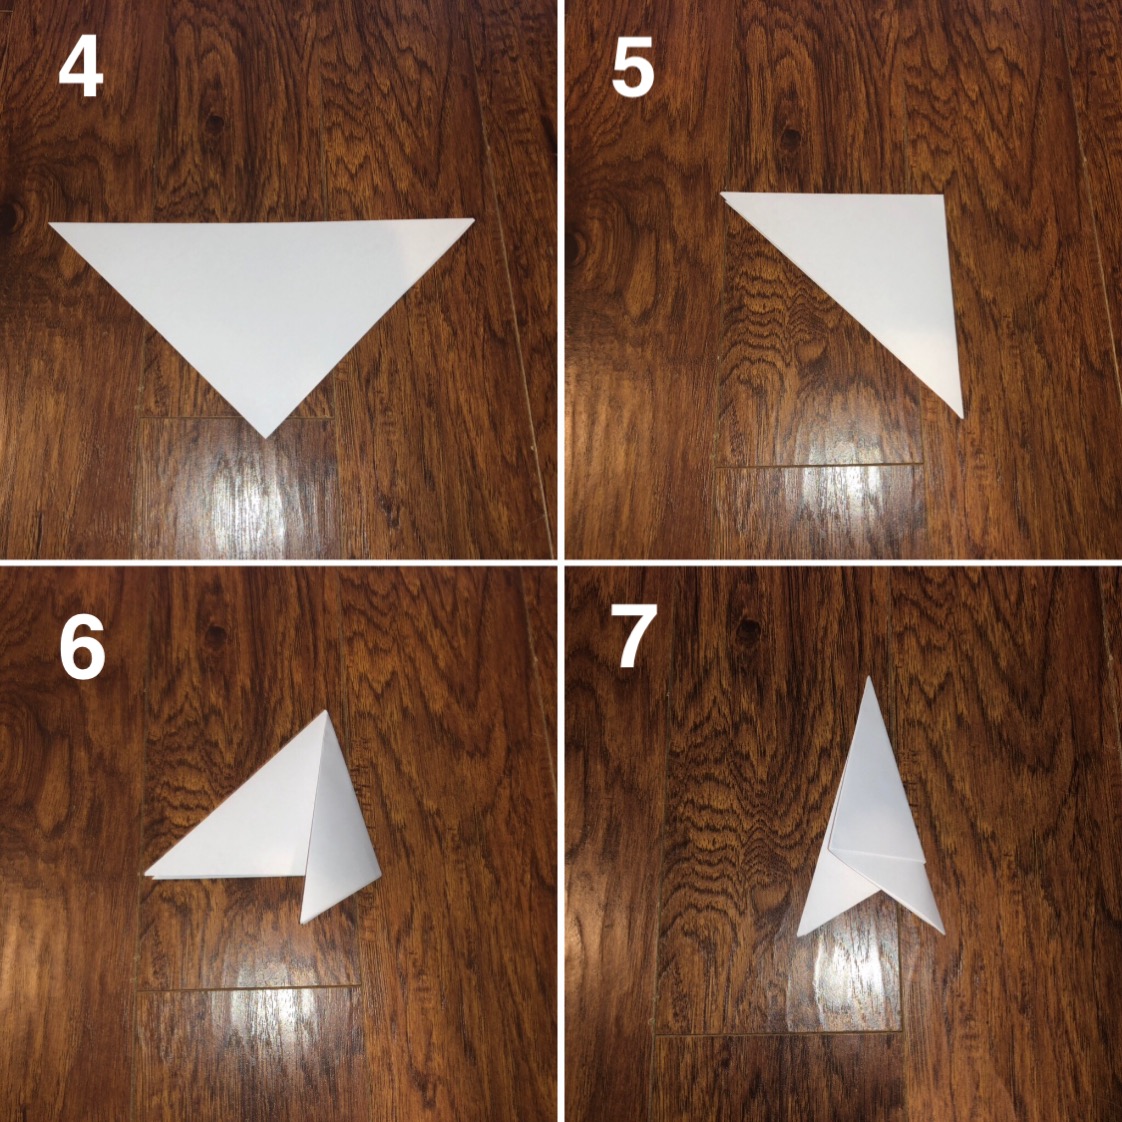
Sarah Fischer/Northern Star
Cut off the “legs” on your folded shape and discard them. Begin cutting shapes into the folded piece of paper, careful not to cut yourself. This is where you can get as creative as you’d like. The more shapes you cut, the more intricate your snowflake will look. Open the paper completely and admire your work!
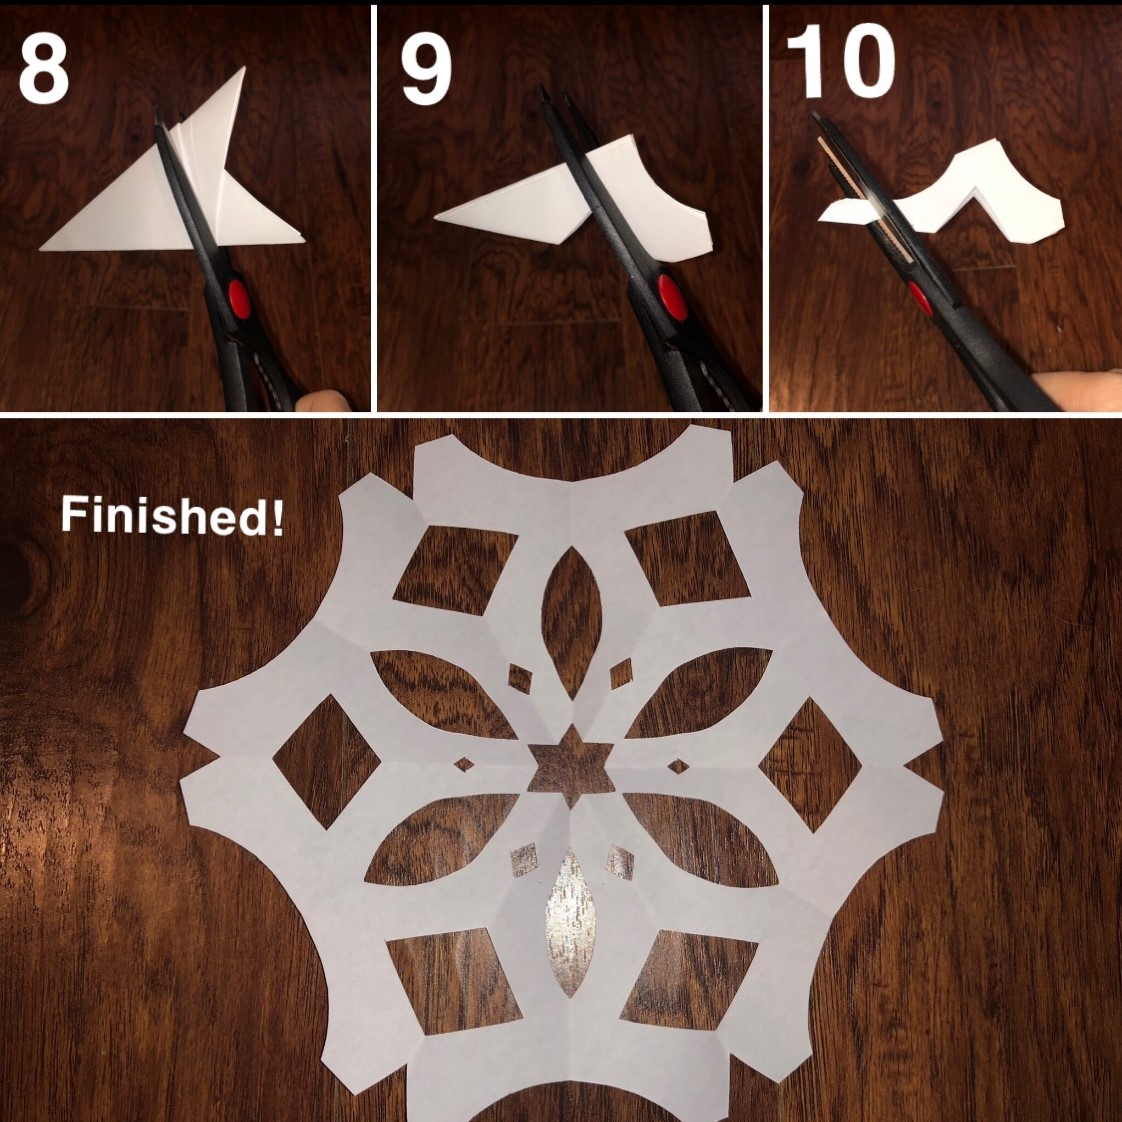
Sarah Fischer/Northern Star
Here are some more examples of the designs you can create:
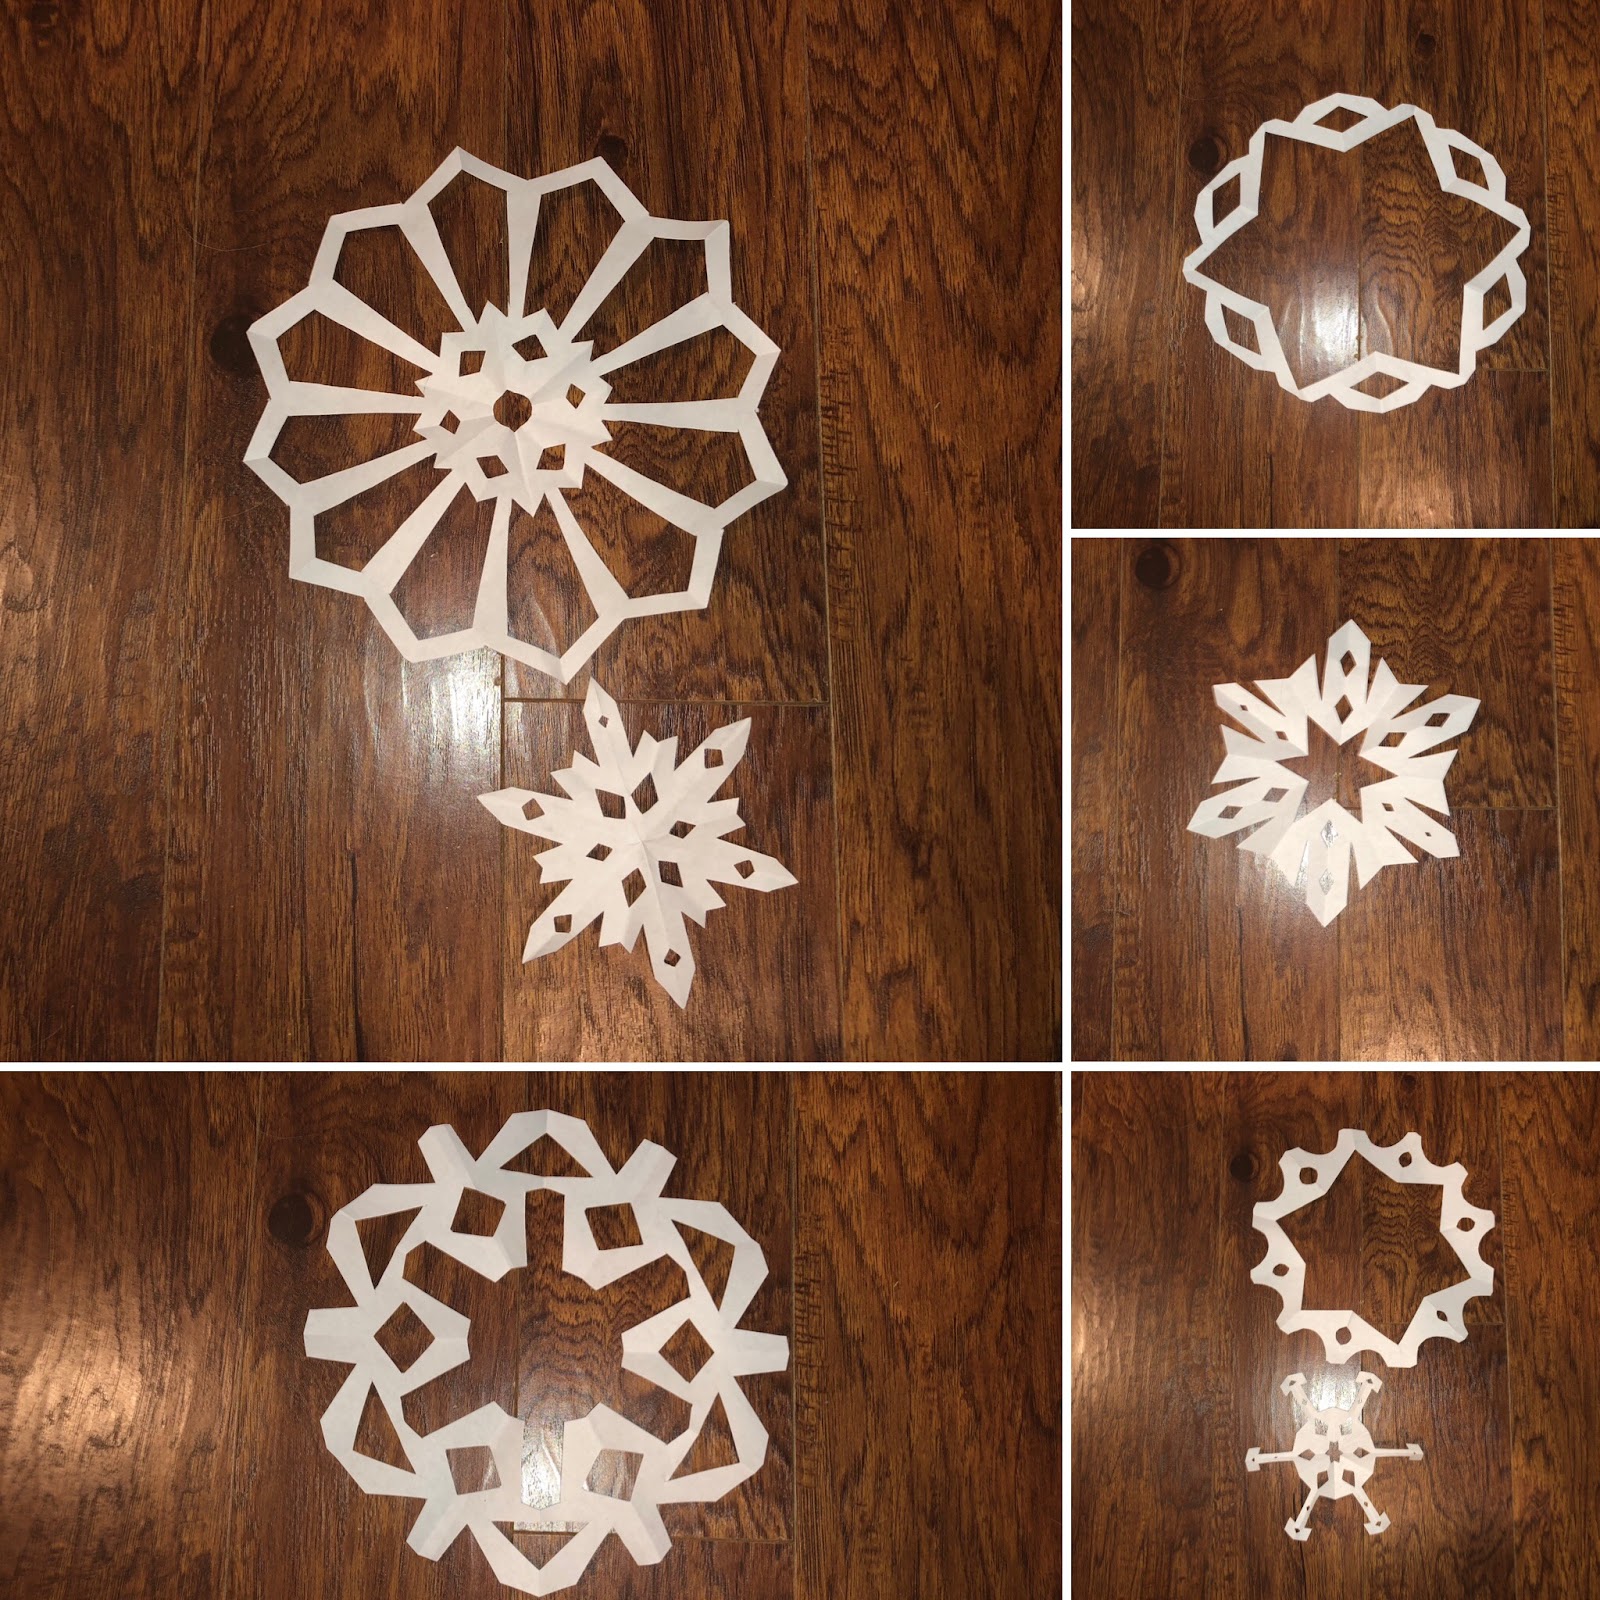
Sarah Fischer/Northern Star


